Introduction to Measures for Welding Process Quality of Grid Steel Structure!
更新时间:2025-01-26 12:32:30•点击:102813 • Grid Knowledge
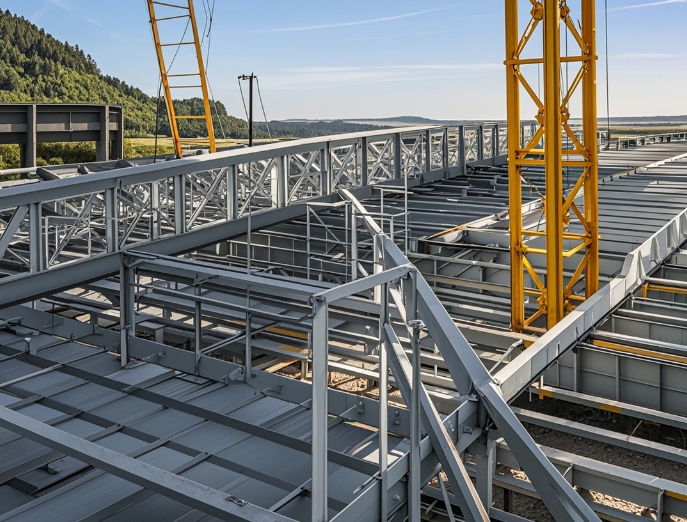
In the connection of grid steel structures, welding processes can take measures from three stages: pre welding, during welding, and post welding to ensure quality, as follows:
Preparation stage before welding
Personnel qualification review: Welders engaged in the welding of grid steel structures must pass the examination and obtain the corresponding qualification certificate, and can only perform welding within the scope of their examination and recognition, ensuring that the welders have proficient operating skills and professional knowledge.
Material quality control
Base material inspection: For steel entering the construction site, its quality certification documents, including chemical composition, mechanical properties, and other indicators, should be checked to ensure compliance with design requirements. At the same time, a visual inspection of the steel must be conducted to ensure that there are no defects such as cracks, interlayers, or double skins.
Selection of welding materials: Based on the material, strength grade, and welding process requirements of the base material, appropriate welding rods, wires, fluxes, and other welding materials are selected. The performance of welding materials should match the base metal and must have quality certification documents.
Material retesting: For steel and welding materials with quality doubts or design requirements, sampling retesting should be carried out. Only after the retesting results are qualified can they be used.
Welding equipment debugging: Welding equipment should be regularly maintained and calibrated to ensure its stable performance. Before welding, the equipment should be debugged to check whether the current and voltage are stable, whether the wire feeding speed is normal, whether the gas flow rate meets the requirements, etc., to ensure that the equipment can operate normally during the welding process.
Welding groove processing: Select the appropriate groove form based on the thickness of the welding piece and welding process requirements, such as V-shaped, U-shaped, X-shaped, etc. Groove processing should be carried out using mechanical processing or plasma cutting methods to ensure accurate groove size, smooth surface, and no burrs or oxides.
Welding assembly quality control
Gap control: When welding components are assembled, it should be ensured that the interface gap is uniform and meets the welding process requirements. Excessive or insufficient gaps can affect welding quality. Excessive gaps can easily cause burn through and poor weld formation, while insufficient gaps may result in incomplete penetration at the root.
Misalignment control: Control the misalignment of the welded component assembly to not exceed the specified value. Misalignment can cause uneven stress on the weld seam, reducing the strength of the welded joint.
Positioning welding quality: The welding material and welding process for positioning welding should be the same as those for formal welding. The positioning weld shall not have defects such as cracks, pores, slag inclusions, etc., and the length and spacing shall meet the process requirements to ensure that the welded part does not deform or shift during the formal welding process.
Welding process control stage
Optimization of welding parameters: Based on factors such as the material, thickness, and groove form of the weldment, the optimal welding parameters are determined through welding process evaluation, such as welding current, voltage, welding speed, gas flow rate, etc. During the welding process, strictly follow the established parameters and do not make arbitrary changes.
Welding sequence planning: Develop a reasonable welding sequence, follow the principles of symmetrical welding, segmented back welding, etc., to reduce welding deformation and stress. For complex grid structures, the welds with large shrinkage should be welded first, followed by the welds with small shrinkage; Weld the welds of the main load-bearing components first, and then weld the welds of the secondary components.
Welding operation specifications
Arc initiation and termination: Arc initiation should be carried out inside the groove, and it is not allowed to initiate the arc arbitrarily on the surface of the welded part to avoid damaging the base material. When extinguishing the arc, the arc pit should be filled to avoid the occurrence of arc pit cracks.
Strip transportation method: Select the appropriate strip transportation method based on the form and position of the weld seam, such as straight line, crescent shape, sawtooth shape, etc. The speed of strip transportation should be uniform to ensure good formation of the weld seam.
Multi layer and multi pass welding: For thicker welded parts, multi-layer and multi pass welding is required. After each layer is welded, the welding slag and spatter should be cleaned up in a timely manner, the surface quality of the weld should be checked, and any problems found should be dealt with in a timely manner. The interlayer temperature should be controlled within the specified range to avoid affecting the welding quality by being too high or too low.
Environmental condition control: The temperature, humidity, wind speed, etc. of the welding operation environment should meet the requirements of the welding process. When the ambient temperature is below the specified value, the welded parts should be preheated; When the humidity is high, dehumidification measures should be taken; When the wind speed exceeds the specified value, protective measures such as windproof shelters should be set up to prevent environmental factors from affecting the welding quality.
Post weld inspection and processing stage
Appearance inspection: After welding is completed, the weld seam should be visually inspected first to check whether the surface of the weld seam is smooth and neat, whether there are defects such as porosity, slag inclusion, cracks, undercutting, and lack of fusion, and whether the weld seam size meets the design and specification requirements. For welding seams with unsatisfactory appearance, timely repair or rework should be carried out.
Non destructive testing: According to design requirements and specifications, non-destructive testing is carried out on welds, such as ultrasonic testing, radiographic testing, magnetic particle testing, penetrant testing, etc., to detect whether there are defects inside the weld. Non destructive testing should be conducted after the appearance inspection of the weld seam is qualified, and the testing ratio and qualification standards should meet relevant requirements.
Welding deformation correction: For the deformation that occurs after welding, mechanical correction or flame correction methods should be used according to the degree and type of deformation. During the correction process, attention should be paid to preventing problems such as cold work hardening or overheating of the steel, which may affect its performance.
Weld defect treatment: For weld defects discovered through non-destructive testing, the causes of the defects should be analyzed and a reasonable repair plan should be developed. The repair process should be the same as or stricter than the original welding process, and the number of repairs should generally not exceed two times. Otherwise, a new welding process evaluation should be developed.
Anti corrosion treatment: After welding, clean the weld seam and surrounding area to remove impurities such as welding slag and splashes, and then carry out anti-corrosion treatment, such as painting anti rust paint, hot-dip galvanizing, etc., to prevent rust and corrosion of the weld seam and improve the service life of the grid steel structure.
Recommended Reading
-
Full analysis of seismic design and maintenance of grid structure
2025-02-27 16:16:52•430666 次
-
What are the key process points to follow in order to ensure the quality of grid processing?
2025-02-27 11:21:00•83203 次
-
What type of construction is the grid mainly suitable for?
2025-02-25 16:42:00•90797 次
-
Quality control requirements of grid manufacturers!
2025-02-25 16:02:44•154164 次
